319-276-4458

comments@butler-bremer.com

Monday – Friday 8:00 – 4:30

Check your email | Pay your bill | If you're a business, click HERE

Butler-BremerButler-Bremer
Butler-Bremer
Butler-Bremer Communications
  • Home
  • INTERNET
  • DIGITAL TV
  • PHONE
  • i wireless
  • PACKAGES
  • BLOG
  • SUPPORT
  • CONTACT
  • ORDER NOW
  • Home
  • INTERNET
  • DIGITAL TV
  • PHONE
  • i wireless
  • PACKAGES
  • BLOG
  • SUPPORT
  • CONTACT
  • ORDER NOW

Support

  • Phone Guides
  • Internet Troubleshooting
  • TV Help
  • Computer Assistance
  • Submit question
  • Tab

How to use your phone features

Here are instructions for using some of our most popular calling features.

Call Forwarding  (*72)

To Activate:

  1. Lift the receiver and listen for dial tone.
  2. Press *72 (1172 on rotary).
  3. Listen for second dial tone.
  4. Dial the number where you want your calls to go to. Speed calling codes may be used if you also have this feature.
  5. When the call is answered, Call Forwarding is activated.
  • If there is no answer or the line is busy, hang up and repeat steps 1 through 4. Two quick tones mean Call Forwarding is activated.
  • Check that your calls are forwarded by pressing *72 (1172 on rotary). A busy signal tells you that Call Forwarding is in effect.
  • Once Call Forwarding is activated, the phone will make one short ring each time a call is forwarded. You still can make outgoing calls from a phone that is Call Forwarded.
  • Change the Call Forwarding number by going through the deactivate steps below and repeating the steps above.

To Cancel Call Forwarding:

  1. Lift the receiver and listen for dial tone.
  2. Press *73 (1173 on rotary).
  3. Two quick tones mean your calls are no longer being transferred.

Call Waiting

  1. When you hear a brief tone, quickly press and release the receiver button, flash button or link button on your phone. Your first call is put on hold and you can answer the second call.
  2. To return to the first call or alternate between calls, quickly press and release the receiver button each time.
  3. You may also answer the waiting call by hanging up and waiting for the second call to ring.
  • To cancel either call, simply hang up. When your phone rings again, you’ll be connected with the person who is still on the line.

To Cancel Call Waiting Per Call:

Here is how to temporarily turn off your Call Waiting feature before making a call that you don’t want to be interrupted:

  1. Lift receiver and listen for dial tone.
  2. Press *70 (1170 on rotary). You will hear three short tones followed by a dial tone.
  3. Place your call.
  4. Call Waiting is restored when you hang up.

Caller ID

Once your Caller ID service is activated, follow the instructions included with your display unit to install and operate.

  • Calls displaying “PRIVATE” or “ANONYMOUS” are callers who have chosen to block delivery of their name and number.
  • Calls displaying “OUT OF AREA” or “UNKNOWN” means that the calling party’s local service or long distance provider’s equipment isn’t transporting the information.

 Caller ID Per Call Blocking

All telephone numbers are either public or private. Because there may be occasions when you want to complete a call without having your name and number displayed, you may block your phone number from showing up on Caller ID units before placing the call:

  • Press *67 (1167 on rotary) before you place a call. This code will block your public number on caller ID units. There is no charge to use this feature and your number will go back to public after completing the call.

Three Way Calling

To Activate:

  1. Put your first call on hold by quickly pressing, then releasing the receiver button, flash button or link button on your phone.
  2. Listen for dial tone and make your second call. Speed calling may be used if you also have this feature.
  3. When that person answers, you may talk privately before completing your three-way connect or;
  4. Firmly and quickly push, then release the receiver button to connect all three of you.
  • If for some reason the call to the third party is not completed, quickly press, then release the receiver button, flash button or link button on your phone to return to your held party.
  • The first call will end when that person hangs up. The second call will end when you push, then release the receiver button.
  • Both calls will end when you hang up.
  • Long distance charges apply if long distance calls are made when using Conference Calling.

Automatic Callback *66

To Activate:

  1. When you call a number that is busy, hang up.
  2. Lift receiver and listen for dial tone.
  3. Press *66. (1166 on rotary)
  4. The busy line will be checked for up to 30 minutes to see when or if the busy line becomes available.
  5. When the line becomes available, you are notified by a distinctive ring – simply pick up the phone and the call will connect.

To Deactivate:

  1. Lift the receiver and listen for dial tone.
  2. Press *86. (1186 on rotary)
  3. Two quick tones mean the redial has been cancelled.

Automatic Recall *69

To Activate:

  1. Lift receiver and listen for dial tone.
  2. Press *69. (1169 on rotary)
  3. The recorded announcement will give number of the last incoming call.
  4. If you want to return the call, press 1 and the calling number will be automatically called.

Speed Calling (*74 or *75)

Speed Calling allows you to reach 8 or 30 frequently called numbers by dialing just one or two digits instead of the entire phone number.

To Program Speed Calling 8 List:

  1. Lift receiver and listen for dial tone.
  2. Press *74 (1174 on rotary) and listen for dial tone.
  3. Dial one of the 8 one-digit access code numbers (2-9).
  4. Dial the telephone number you wish to add to the list. (For long distance entries, dial “1″ and the area code before the number.) Listen for a confirmation tone to indicate your Speed Calling number is established.
  • To change your speed calling list, repeat the programming steps and overwrite the current speed dial number.
  • Repeat this process for each number you wish to speed dial, assigning a different speed dial number to each telephone number.

To Program Speed Calling 30 List:

  1. Lift receiver and listen for dial tone.
  2. Dial *75 (1175 on rotary) and listen for dial tone.
  3. Dial one of the 30 two-digit access code numbers (20-49).
  4. Dial the telephone number you wish to add to the list. (For long distance entries, dial “1″ and the area code before the number.) Listen for a confirmation tone to indicate your Speed Calling number is established.
  • To change your speed calling list, repeat the programming steps and overwrite the current speed dial number.
  • Repeat this process for each number you wish to add to the list, assigning a different speed dial number to each telephone number.

To Use Your Speed Calling List:

  • For touch-tone, dial the one or two digit code, followed by the # button.
  • For rotary dial, dial the one or two digit code.

How to setup and use your Voice Mail

With Voice Mail service from Butler-Bremer Communications, you will know you have a message when you pick up your phone & have a stutter dial tone.

To access your voice mail:

  1. Dial 276-6245 if you are at home or within the Tripoli, Frederika, Plainfield, Clarksville, or Shell Rock calling area.  If you are out of town, you will need to dial 1-319-276-6245 to access the voice mail.
  2. When prompted, enter your home telephone number (without the area code), then push the # key.
  3. When prompted, enter your four-digit password, followed by the # key. If this is your first time accessing your voice mail, the default password is 0000 (four zeros).

Once you have accessed your Voice Mail, you can do all of the things listed below:

Record your greeting:

  1. Access your voice mailbox.
  2. Press 9 for the mailbox set-up menu.
  3. Press 1 for greeting options.
  4. Press 4 to record your greeting.
  5. Record your greeting and then press the # key.
  6. Press 2 to keep your greeting.

Change your PIN (4-digit password):

  1. Access your voice mailbox.
  2. Press 9 for the mailbox set-up menu.
  3. Press 2 to change your password.
  4. Enter your new password and then press the # key.
  5. When prompted to verify the password, enter it again and then press the # key.

Retrieve your messages:

  1. Access your voice mailbox.
  2. When prompted, press 1 to listen to voice mail messages.  You will then hear the announcement “You have xx new messages and xx saved messages.”
  3. Press 1 to listen to new messages.
  4. Press 2 to listen to saved messages.

When retrieving messages, you can:

  • Press 1 to play the message again
  • Press 2 to save the message and play the next
  • Press 3 to delete the message and play the next
  • Press 4 to save the message as new

Using Voice Mail to E-Mail (to use this feature you will need to contact our office so that we can set it up for you):

  1. Check your e-mail as you normally would.
  2. When you get a voice mail message, you will receive an e-mail from ‘YOURTELEPHONE’ delivered right to your inbox.  The message will have an attachment.
  3. Open the attachment and your media player will play the voice mail message.
  4. If desired, you may save the attachment on your PC.
  5. Follow the links in the message to save or delete the message from the voice mail system.

Troubleshoot your Internet connection

First, check power to your modem/router:

  • Is the modem/router plugged in, turned on, and getting power?
  • Are all the connections tight and secure?
  • Are all the cords and cables connected to the correct port or outlet?

Then, restart (power cycle) your modem/router: 

Unplug the power cord for at least 20 seconds and then plug it back in again. Wait 2 minutes for the modem/router to finish its restart. Note: Keep in mind your modem/router runs 24/7. An occasional break gives it an opportunity to clear out the old “junk.”

Finally, restart (reboot) your computer or device:
Power OFF and restart your computer (or device). To give your computer a chance to clear out its cache and reconnect settings, wait at least 2 minutes before trying to access the Internet.

Increase your Internet speed

Even though we live in a day and age where 10 Mbps download speeds are common, there are still lots of things that can slow down your Internet. And if you tweak even a few of them, you can dramatically increase your speeds! So before you blame your Internet connection, give a few of these a try to see if it isn’t your computer, your modem or your router that’s slowing you down. And if you still need more speed, let us know!

1)      Check & optimize your hardware

Before you do anything else, you’ll want to test your hardware. First, reboot your router and your modem. Turn them off for a full minute (no cheating!) and then turn them back on.Just that single step can significantly speed up your Internet.

Once you’ve rebooted, check your direct Internet connection on your main device (usually a computer or laptop): Shut down your computer, restart, and plug it into your modem with an ethernet cable. Then run a speed test (www.speedtest.net). This will give you the true speed you are actually receiving.

Now that you know your bottom line speed, let’s see if we can’t make your wifi a little faster with these easy tweaks!

2)      Stay plugged in

Wifi is undoubtedly the greatest thing since sliced bread. But if you need some seriously fast Internet speed, you should plug your computer directly into your modem via ethernet for a major boost in speed!

Experts estimate that using the Internet over wifi degrades your Internet speed by around 30% (because of the reasons below), so a 10 Mbps connection automatically becomes a 7 Mbps connection with wifi. And, with less sophisticated antennae, phones and tablets will be even slower over wifi than laptops.

3)      Move your router (or your device)

If you have too much space between your router and your device, you will undoubtedly experience diminished Internet speeds.  A good rule of thumb for a solid wifi connection is to make sure your device is within 60 feet of your router.

Additionally, physical barriers from walls, brick, metal and furniture between your device and your router can also slow down your connection.

Finally, household items like microwave ovens, cordless phones, TVs, baby monitors and garage door openers can create noise on the same frequencies as your wifi. Moving your device at least 10 feet away from one of these items can improve your speed.

4)      Replace your router

Routers have evolved significantly in the last few years, and a router that met your needs five years ago probably won’t meet your needs today. With increased demands for faster wifi speeds from more devices, it may be time to upgrade.

An 802.11n router will meet the needs of most households. However, if your household is heavy on wifi use (gaming, streaming, sending/receiving large files) a new, more powerful 802.11ac router could make a world of difference.

5)      Kick the kids off wifi

The more people using wifi at the same time in your home, the slower everybody’s speeds will be. So if your daughter is streaming Netflix and your wife is playing Candy Crush while you’re trying to work from home, even if you have 10 Meg speeds, they are using up a good chunk of it (find out below how much speed you really need). Kick them off and you can keep all the speed for yourself (cue malicious laughter here: Bwahahahahah!)

6)      Delete unneeded programs on your computer and close the ones you aren’t using

You know that place in your house where everybody drops things when they come in the house? Mail, keys, sunglasses…after a while everybody’s stuff just accumulates into a giant pile of clutter. Computers can be the same way! Maybe you needed a program for an old project; or maybe your kids downloaded a bunch of games or programs they’ve since outgrown. If you don’t constantly purge the clutter, it can fill up your computer with junk and slow it down to a crawl.

7)      Scan for viruses, malware & spyware

Those nasty, nasty bugs can eat up your bandwidth allocation, which can significantly slow down both your computer, and your Internet speed. If you notice a sudden drop in speed (or a suddenly very slow computer), run a scan immediately! And once you remove the intruders, make sure your computer is protected.

8)      Create more space on your computer

Over time, all those Internet searches you do create a LOT of junk on your computer. But luckily, there is a great FREE program that can delete all that junk and instantly make your computer, and your Internet, faster! CCleaner PC Cleaner automatically removes junk files; temporary files; Internet history, cookies and caches; unused startup programs; and even defrags your disk. Every time I “clean” my computer, CCleaner removes nearly a Gig of “junk,” making my Internet noticeably faster. Give it a try and see for yourself!

9)      Use a different browser

According to the federal government’s Digital Analytics Program (DAP), nearly 30% of us are still using IE (Internet Explorer). While it’s a great browser, IE uses a lot of resources, which can slow you down.

Try switching to either Chrome or Firefox. Chrome uses very little memory and is great for surfing Flash & JavaScript sites. Firefox has extensions that let you block ads, flash, and other things that slow you down. Simply switching browsers can make for a much faster surfing experience.

10)   CLOSE YOUR TABS!

When you have 10 (or let’s be honest, 50) tabs open, they can be constantly updating and eating up your bandwidth. This will cause a significantly slower Internet experience. If you need easy access to certain sites, bookmarking them is a much better way to go.

Calculate how much Internet speed you need

How much Internet speed do you need?

Digital TV Troubleshooting

If you have any problems with your Digital/HD TV service, please use this troubleshooting guide first to determine whether or not a technician is needed to fix the issue.  Many Digital TV problems can be easily fixed with the steps below. However, if you follow these steps and are not able to fix your problem, please call our office at 319-276-4458 or 1-800-830-1146 for assistance.

I am getting the message “No Signal”

1) If you are getting this message, first make sure there is power to the Amino set-top box.  If you have a DVR set-top box, the light on the front of the box should be green.  If you have a non-DVR set-top box, there should be a small red light on the front of the box.

If there is no light on the front of the box, make sure that the power cord is plugged firmly into the back of the set-top box and also securely into the electrical outlet.

You may also try to plug the set-top box into a different outlet to verify the outlet is not the problem.  If you still cannot get a power light on the set-top box, you will need to call our office since either the set-top box or the power cord for the set-top box will most likely need to be replaced.

2) If the set-top box has a power light, the problem is most likely that the TV is on the wrong input.  Changing the TV input will vary slightly depending on your TV.

On your Butler-Bremer remote control, there is a button at the top labeled “AV.”  Pressing this button (while pointing it at your TV) will generally cause one of three things to happen.  It can make the current input name pop up on the screen, it can switch to the next available input, or it can bring up a list of inputs.

On many TVs, pressing the AV button again right away will cause the input to change.  Once the input changes you may need to wait a few seconds to see your picture comes back.  If it does, you are now on the right input.  If it does not, you will need to press the AV button again (possibly two times in a row like before) to change it to the next input.  Again, you may need to wait to see if the picture comes in.  You may need to cycle through multiple inputs before you get on the correct one.

If you still use your original TV remote to turn your TV on and off, you will need to use this remote in order to change the TV input.  Unfortunately, depending on the TV, the AV button may or may not be labeled as AV on your remote.  It could be labeled as “Input”, “Source”, or it could have individual labels for each input, such as HMDI1, Component 1, etc…


I am getting the message “Error during video start” or “The Requested URL could not be found”

1) If you are getting the message “Error during video start”, first try to change the channel.  If the channel is having problems on their end or if we are having a problem with that particular channel, you will get this message most times.  If you are able to change the channel and other channels come in fine, please call our office to let us know that a particular channel is not working.

2) If you change channels and you are getting the “Error during video start” message on multiple channels, or if you are getting an error message that reads “The requested URL could not be retrieved,” rebooting your Amino set-top box will correct the problem most of the time. 

To do a reboot, you simply need to unplug the set-top box from the electrical outlet, leave it unplugged for 20-30 seconds, and then plug it back in.  You want to make sure that you unplug it from the electrical outlet, so once it is unplugged, check to make sure the red or green light is off on the front of the box.  If it is still on, you have unplugged the wrong cord.  If it is easier for you to access the set-top box instead of the electrical outlet, you can unplug the power cord from the back of the set-top box instead.  Again, make sure the red or green light goes off on the front of the box so you know you have unplugged the right cord.  Once you have plugged the power cord back in, please be patient, as you will see multiple screens pop up on the TV before the picture comes back.

If you reboot the set-top box and you still are receiving the “Error during video start” or “The requested URL could not be found” error message, try rebooting one more time, leaving the box unplugged for at least one minute this time.  If, after rebooting a second time, you are still receiving the error message, you will need to call our office so we can have a technician stop and look into the problem.


I can’t change the TV volume and I can’t turn the TV on or off

When our technicians set up the digital/HD service at your residence, they program the remote control so that you can turn your TV on and off and control the volume with your Butler-Bremer remote control.  If those two functions stop working, the first step is to try and replace the batteries to the remote control. 

If that does not work, the remote control will probably need to be reprogrammed.  Please call our office and one of our customer service representatives can walk you through reprogramming the remote control.  If we can’t get the remote control to reprogram correctly, we may need to replace the remote control.

Remote Control User Guide

Click HERE for a guide to either of our two remote controls!

TV User Guide

Click HERE for a complete guide to your Butler-Bremer TV service, including how to record with your DVR, how to set Parental Controls, and more!

Fixing your Aspect Ratio

Aspect ratio is the term applied to the format in which your video image is projected, commonly either standard (also known in ratio terms as 4:3, 4×3 or 1.33:1), or widescreen (otherwise known as 16:9, 16×9 or 1.78:1). Older TV screens and computer monitors had the standard, boxier shape (4:3 ratio) – only 33 percent wider than it was high. On the other hand,widescreen (16:9 ratio) is the native format of most HDTV programming; it is 78 percent wider than it is tall, or fully one-third wider than standard 4:3.

When viewed on matching screens, the widescreen image is a distinct improvement, offering not only a larger image, but also a horizontal orientation most like the way in which your eyes view and interpret information.

Both formats work perfectly well when matched to the TV screen’s native aspect ratio –standard programming on a 4:3 screen (any 1950s to 1990s Nick at Nite fare, for instance), and any newer, widescreen material on a 16:9 set (HDTV programming or most DVDs). If, however, you want to watch standard content on a widescreen TV or monitor, or widescreencontent on a standard screen, you’ll need to make some choices as to how you’ll compromise.

Most TVs, computers and devices offer some form of Aspect Ratio Control. For example, while many viewers prefer the newer widescreen format when viewing virtually all content, still others decry the letterboxed image when trying to view widescreen content on a standard format TV or monitor. Letterboxing produces black bars above and below the image, to displace the now-unused vertical portion of the screen. Yet even letterboxing can be managed, if you know what to do.

For more information on aspect ratios, and getting the most out of your viewing experience, visit our standard or widescreen pages. Or give one of our friendly Customer Service Specialists a call.

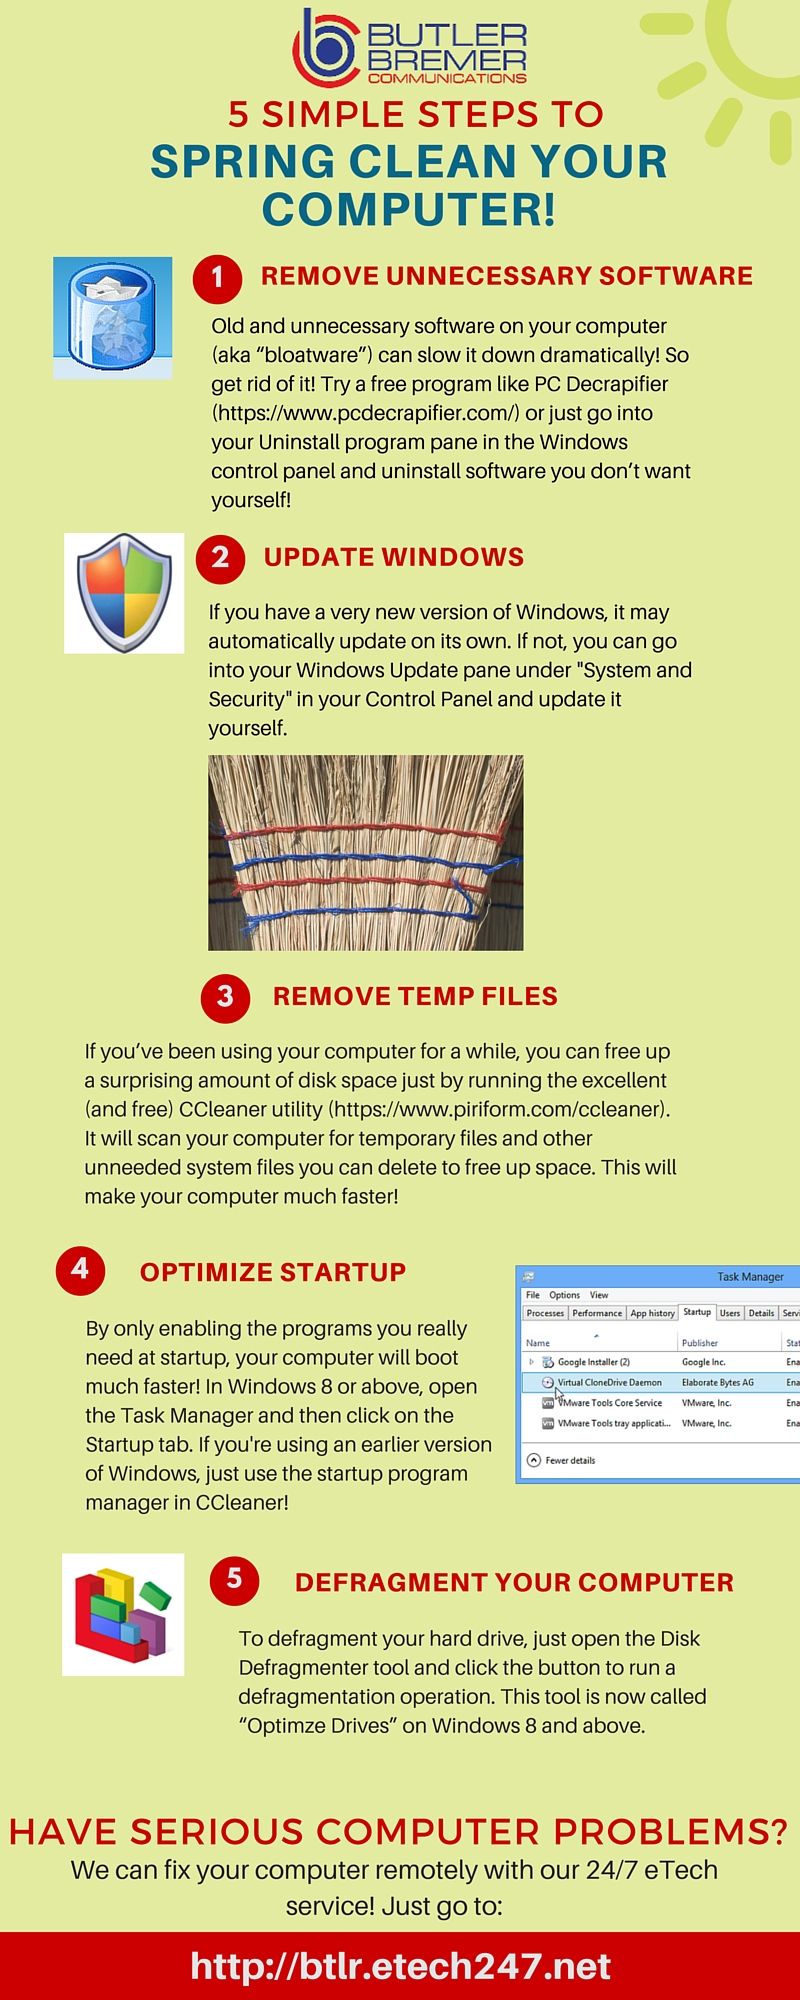
How to clean up your computer for better performance

Spring clean infographic

Can’t find the answer to your questions? Send us an email! We’ll get back to you shortly, and will update our support section with your answers!

Send us your question!clear

Empty tab. Edit page to add content here.
https://vimeo.com/178365499
About Us

Butler-Bremer provides Digital TV, High Speed Internet and voice services to customers in and around Plainfield, Clarksville, Frederika, Tripoli, Nashua and Shell Rock, Iowa over a fiber-optic network; as well as i wireless service over our advanced 4G LTE network throughout Chickasaw County.

Our philosophy is same today as it’s been for the last 100 years: to offer top quality products and services, exceptional customer service, employ local people, support the communities we serve, and charge the lowest rates possible.

We appreciate the opportunity to serve you!
Contact info
Phone: 319.276.4458
Toll-free: 1.800.830.1146
24/7 Tech Support: 866.276.8253
Email: comments@butler-bremer.com
Hours: 8:00 AM to 4:30 PM, Monday - Friday

Find us on:

FacebookLinkedin
News
  • Gamer’s Rejoice!
    September 21, 2016
  • What do our customers say about Butler-Bremer?
    August 31, 2016
  • Don’t forget to watch the AG bowl tomorrow night at 7 on CSN+!
    August 24, 2016
  • Comcast Sports Network is the new home of IHSSN championship sports!
    August 19, 2016
  • Save $80/month for a limited time!
    August 9, 2016
Copyright © Butler Bremer Communications

Video Subscriber Privacy Notice | Acceptable Use Policy | Limitation of Liability | Sign up for Auto Draft